Ryobi CSB141LZ Manuel de l'opérateur
Naviguer en ligne ou télécharger Manuel de l'opérateur pour Scies circulaires Ryobi CSB141LZ. Ryobi CSB141LZ Operator`s manual Manuel d'utilisatio
- Page / 24
- Table des matières
- MARQUE LIVRES
Résumé du contenu
SAVE THIS MANUAL FOR FUTURE REFERENCEYour laser circular saw has been engineered and manufactured to our high standard for dependability, ease of oper
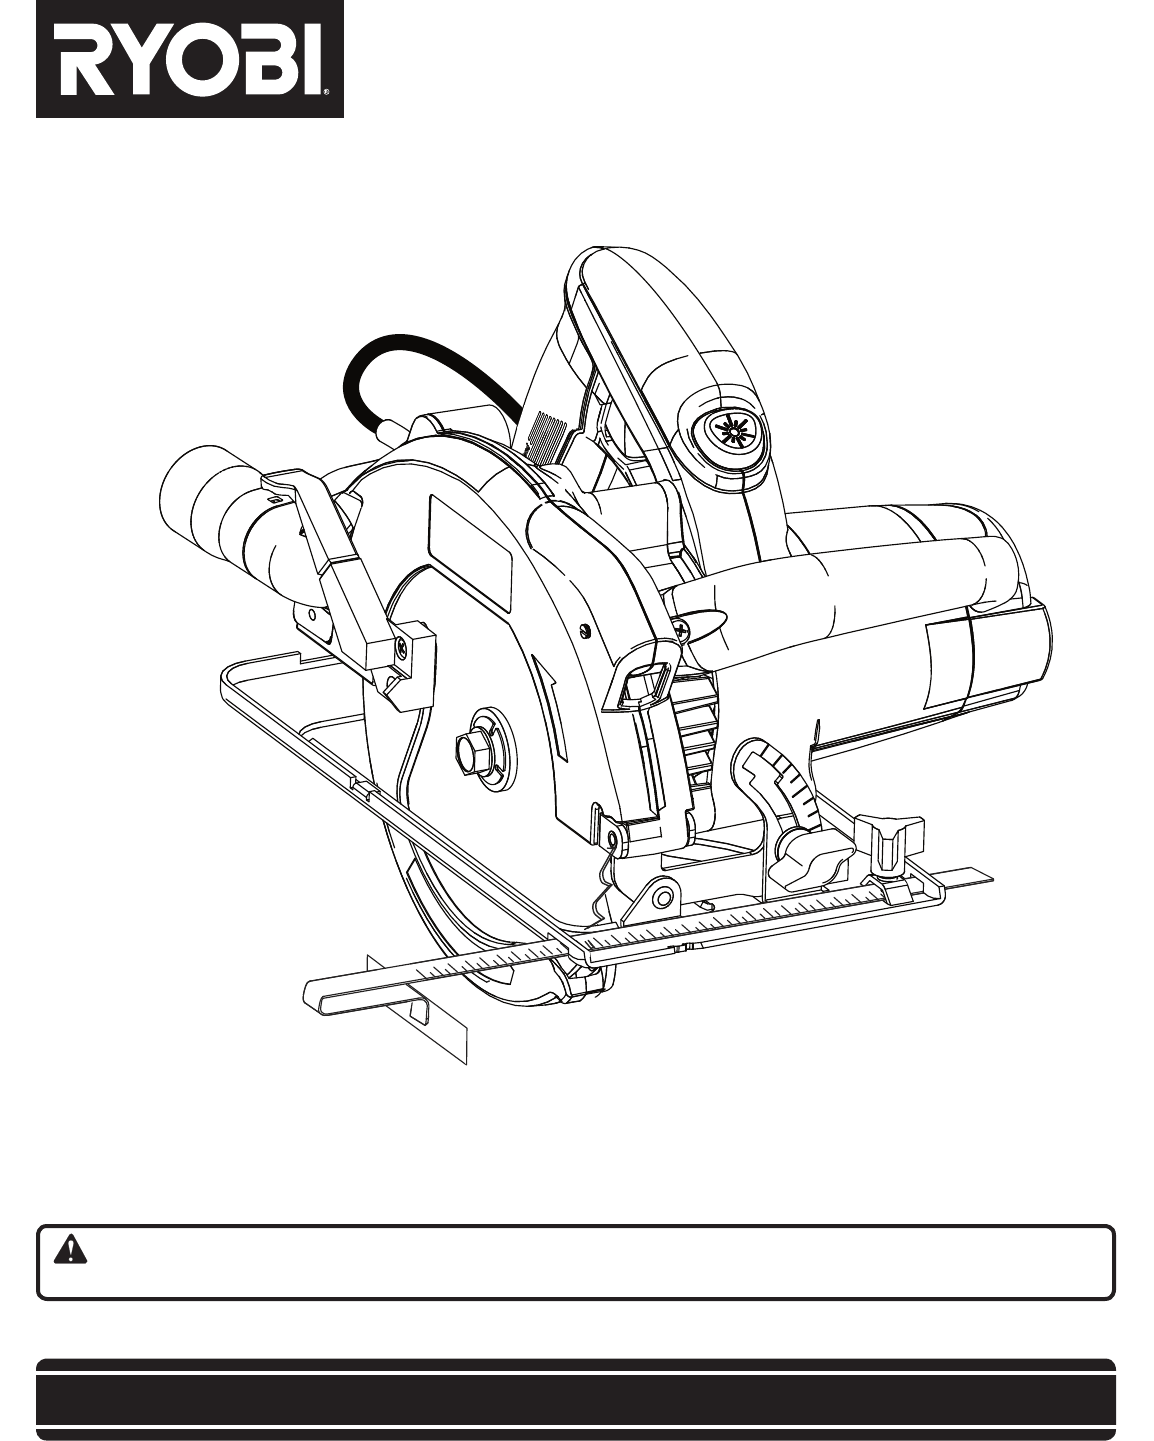
10 11FEATURESKNOW YOUR LASER CIRCULAR SAWSee Figure 1.Before attempting to use this product, familiarize yourself with all operating features and safe
10 11ASSEMBLYBLADEWARNING: A 7-1/4 in. blade is the maximum blade capacity of the saw. Also, never use a blade that is too thick t
12 13ASSEMBLYFig. 4WRENCHSPINDLE LOCK BUTTONREMOVING BLADESee Figure 4.n Unplug the saw.n Depress spindle lock button.n Remove blade screw by turning
12 13OPERATIONWARNING:Do not allow familiarity with tools to make you care-less. Remember that a careless fraction of a second issufficient t
14 15DANGER:When sawing through work, lower blade guard does not cover blade on the underside of work. Since blade is exposed on underside of
14 15STARTING/STOPPING THE SAWSee Figure 11.To start the saw: Depress the switch trigger. Always let the blade reach full speed, then guide the saw in
16 17OPERATIONOPERATING THE SAWSee Figures 13 - 15.It is important to understand the correct method for operat-ing the saw. Refer to the figures in th
16 17OPERATIONUSING THE LASER GUIDESSee Figure 16.WARNING:Do not stare into the laser beams or turn the lasers on when the tool is not in use. Failure
18 19OPERATIONCROSS CUTTING/RIP CUTTINGSee Figures 18 - 20.When making a cross cut or rip cut, align the line of cut with the outer blade gu
18 19BEVEL CUTTINGSee Figures 21 - 22.To make the best possible cut:n Align the line of cut with the inner blade guide notch on the base when making
2 3n Introduction ...
20 21POSITIVE 0° BEVEL STOPSee Figure 23.The saw has a positive 0° bevel stop that has been factory adjusted to assure 0° angle of the saw bla
20 21OPERATIONPOCKET CUTTINGSee Figures 24 - 25.WARNING:Always adjust bevel setting to zero before making a pocket cut. Attempting a pocket cu
22 23ADJUSTMENTSFig. 27REMOVE DUST NOZZLE AND ADAPTORSCREWFig. 26Fig. 28FRONT LASERADJUSTING SCREWLASER BARRELWARNING:Before performing any adjustment
22 23Fig. 29WARNING:Do not at any time let brake fluids, gasoline, petroleum-based products, penetrating oils, etc., come in contact with plastic pa
24RYOBI TECHNOLOGIES, INC.1428 Pearman Dairy Road, Anderson, SC 29625Post Office Box 1207, Anderson, SC 29622-1207Phone 1-800-525-2579www.ryobitools.c
2 3GENERAL SAFETY RULESWARNING:Read and understand all instructions. Failure to follow all instructions listed below, may result in electric shock, fi
4 5GENERAL SAFETY RULESSPECIFIC SAFETY RULESSERVICEn Tool service must be performed only by qualifiedrepair personnel. Service or maintenance p
4 5SPECIFIC SAFETY RULESWARNING: Some dust created by power sanding, sawing, grinding, drilling, and other construction activities contains chemicals
6 7SYMBOLSSome of the following symbols may be used on this tool. Please study them and learn their meaning. Proper interpreta-tion of these symbols w
6 7SYMBOLSSERVICEServicing requires extreme care and knowledge and should be performed only by a qualified service technician. For service we
8 9EXTENSION CORDSWhen using a power tool at a considerable distance from a power source, be sure to use an extension cord that has the capacity to
8 9FEATURESFig. 1PRODUCT SPECIFICATIONSn Blade Diameter ............ 7-1/4 in.n Blade Arbor......
Produits connexes et manuels pour Scies circulaires Ryobi CSB141LZ
 (16 pages)
 (1 pages)
 (44 pages)
© 2020, manymanuals.fr. Tous droits réservés | 0.356 s |
 Manymanuals.com
 Manymanuals.de
 Manymanuals.fr
 Manymanuals.it
 Manymanuals.pl
 Manymanuals.cz
 Manymanuals.es
 Manymanuals-pt.com
Commentaires sur ces manuels