8
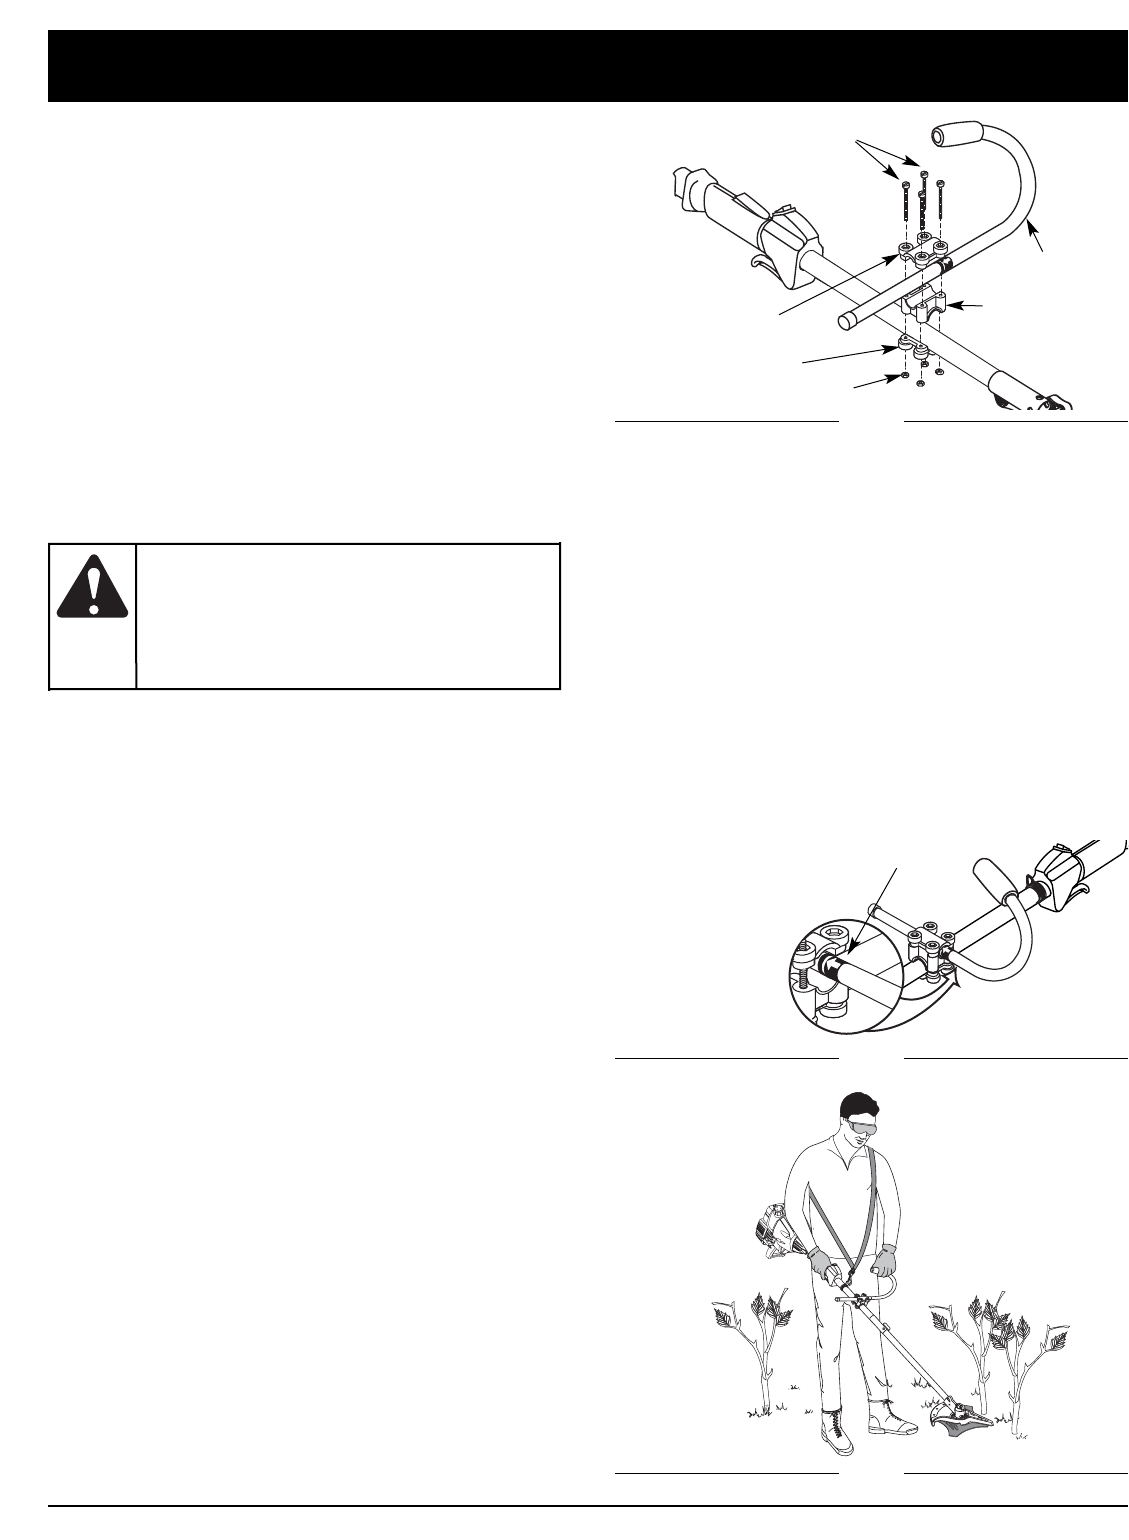
(4) Screws
Top Clamp
J-Handle
Middle Clamp
Bottom Clamp
Nuts
ASSEMBLY INSTRUCTIONS
INSTALL AND ADJUST THE 24” J-HANDLE
Installing
1. Remove the screws, nuts, clamp pieces that were
installed on the J-handle for shipping.
2. Hold the bottom clamp to the underside of the shaft
housing, about 7-8” from the shaft grip (Fig. 1).
3. Place the J-handle between the top and middle
clamp pieces (Fig. 1).
4. While holding the three pieces together, install the
four (4) screws through the top clamp and into
middle clamp.
NOTE: The holes in the top and middle clamp will line
up only when assembled correctly.
5. Place the clamps and J-handle the over the shaft
housing and onto the bottom clamp.
6. Hold each hex nut in the bottom clamp recess with a
finger. Start screws with a large Phillips screwdriver.
Do not tighten until you make the handle adjustment.
Decal
Adjusting
7. Loosen the screws so that the J-handle can be easily
moved in the clamp assembly. Do not remove the
screws or nuts.
8. Slide the J-handle in or out until the arrow/white line
on the decal touches the clamp assembly
(Fig. 2).
9. While holding the unit in the operating position
(Fig. 3), maneuver the J-handle to the location
that provides you the best grip.
10. Tighten the clamp screws evenly, until the J-handle is
secure.
NOTE: Once the new J-handle is installed, there is no
need to change back to the original handle when
you are done using the attachment. Keep this
new handle installed when you use your original
unit as a string head trimmer.
Fig. 2
IDENTIFY & REMOVE YOUR ASSIST HANDLE
Your trimmer is configured with one of many types of
assist handles. You must remove the current assist
handle and install the 24” J-handle (included) in order to
use the TBBC attachment.
Consult your trimmer’s manual to determine what type of
handle you have. Follow the instructions outlined in the
manual in order to remove the current handle and its
clamps, screws, nuts, bolts or other hardware.
NOTE: Your trimmer may be equipped with a small
J–handle. This small handle is NOT an acceptable
substitute for the larger J-handle that is included
with the TBBC. Remove the smaller J-handle so
you can install the larger, 24-inch handle.
Before you can use the TBBC attachment, you must
make some adjustments to the trimmer or trimmer/
brushcutter that you are attaching the TBBC to. You will
have to:
• Remove your current assist handle
• Install the supplied 24” J-handle
• Install the shoulder strap clip (if necessary)
• Attach/adjust the shoulder strap
These instructions are explained on the next couple
pages.
To comply with
safety regulations,
you MUST use the large 24” J-handle that is
included with the attachment when
operating the TBBC. The handle is required
as a barrier bar to the brush blade.
WARNING:
Shaft
Grip
Fig. 1
Fig. 3
 (20 pages)
 (46 pages)
 Manymanuals.com
 Manymanuals.de
 Manymanuals.fr
 Manymanuals.it
 Manymanuals.pl
 Manymanuals.cz
 Manymanuals.es
 Manymanuals-pt.com
Commentaires sur ces manuels