Ryobi RT501W Spécifications Page 12
- Page / 28
- Table des matières
- MARQUE LIVRES
- Contact Wolfcraft 1
- @ 888-574-5757, ext 1
- TABLE OF CONTENTS 2
- INTRODUCTION 2
- RULES FOR SAFE OPERATION 3
- FEATURES AND SPECIFICATIONS 5
- (Continued) 8
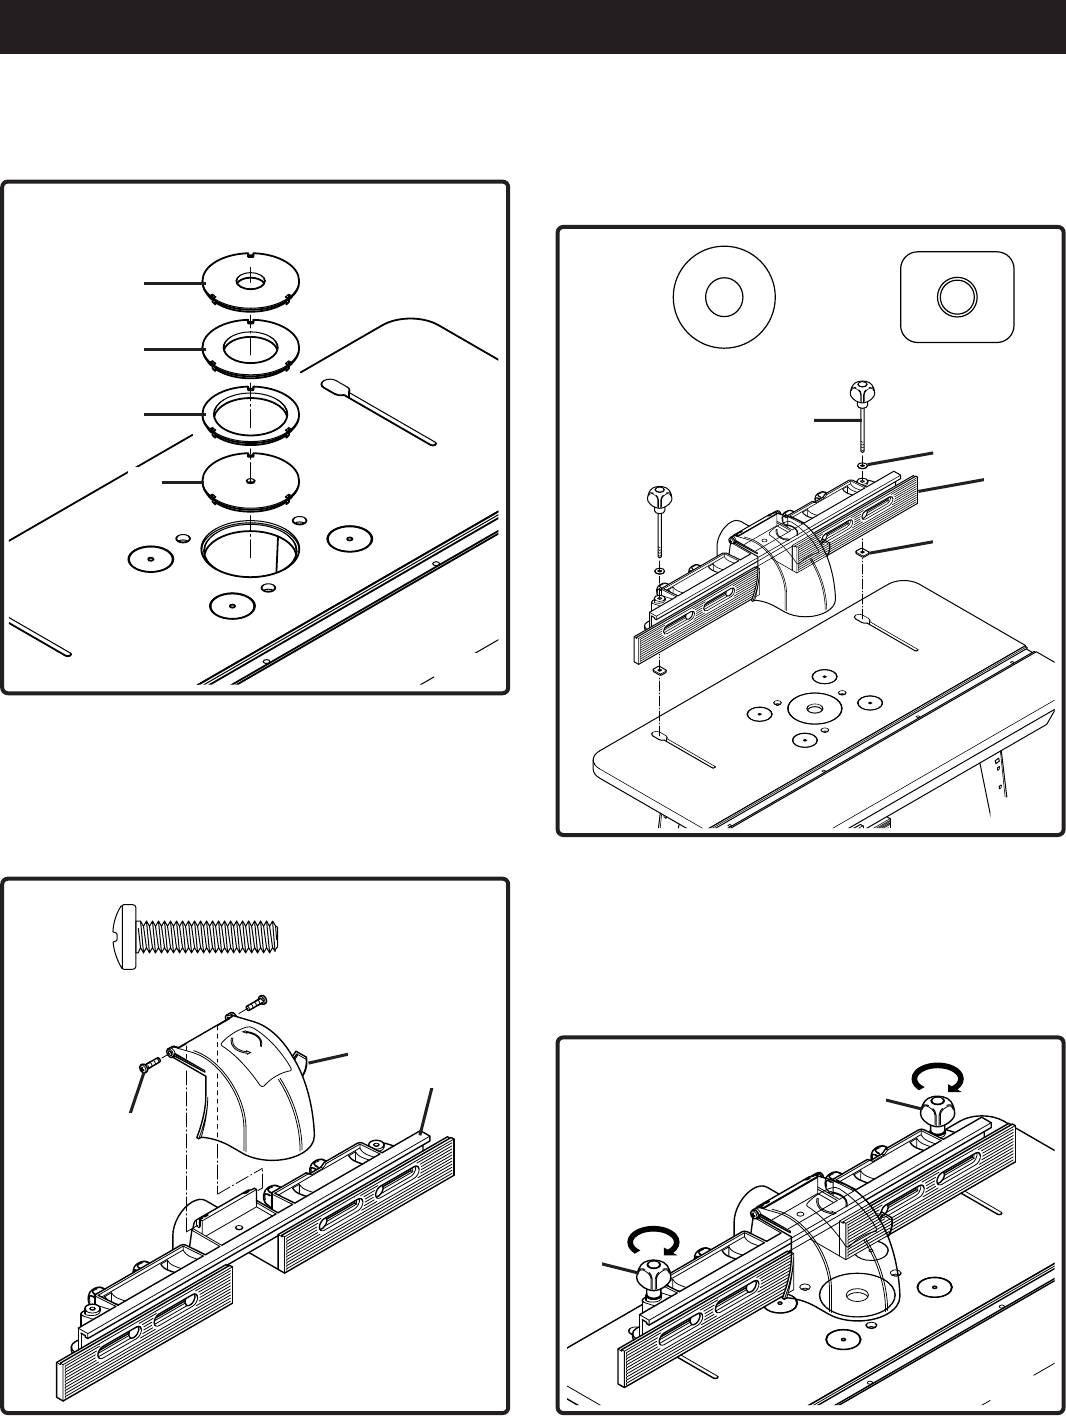
- ASSEMBLY 10
- MOUNTING THE ROUTER 14
- SWITCH BOX 18
- Table flatness adjustment 20
- OPERATION 20
- ACCESSORIES 24
- SECURING THE ROUTER TABLE 24
- REPAIR PARTS 25
- OPERATOR’S MANUAL 28
Produits connexes et manuels pour Mise en réseau Ryobi RT501W
 (24 pages)
 (2 pages)
© 2020, manymanuals.fr. Tous droits réservés | 3.454 s |
 Manymanuals.com
 Manymanuals.de
 Manymanuals.fr
 Manymanuals.it
 Manymanuals.pl
 Manymanuals.cz
 Manymanuals.es
 Manymanuals-pt.com
Commentaires sur ces manuels