Ryobi SA1202 Manuel d'utilisateur Page 17
- Page / 20
- Table des matières
- MARQUE LIVRES
- OPERATOR'S MANUAL 1
- CORDLESS DRILL-DRIVER 1
- INTRODUCTION 2
- TABLE OF CONTENTS 2
- GENERAL SAFETY RULES 3
- SPECIFIC SAFETY RULES 4
- SAVE THESE INSTRUCTIONS 5
- UNPACKING 7
- APPLICATIONS 7
- SPECIFICATIONS 7
- FEATURES 8
- ADJUSTMENTS 10
- OPERATION 13
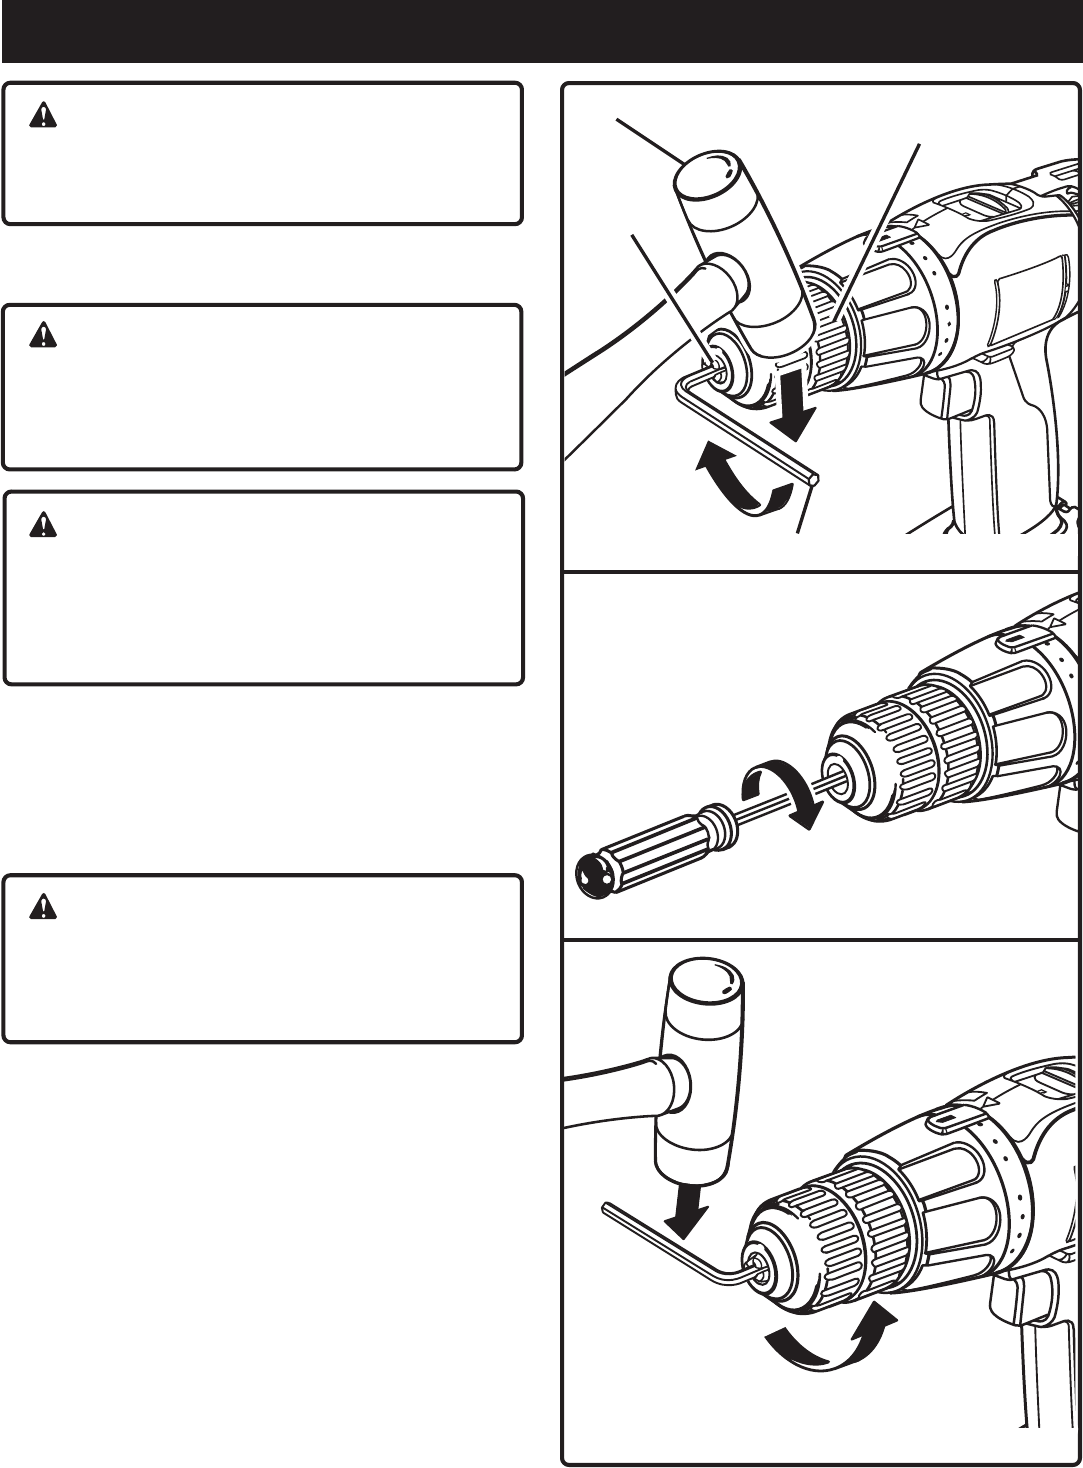
- MAINTENANCE 17
- TION FOR RECYCLING 18
- TO RETIGHTEN A LOOSE CHUCK 18
- BATTERIES 18
Produits connexes et manuels pour Outils Ryobi SA1202
 (22 pages)
(16 pages)
(24 pages)
(18 pages)
(24 pages)
(22 pages)
(16 pages)
(24 pages)
(18 pages)
(24 pages)

 (52 pages)
(22 pages)
(52 pages)
(22 pages)


 (77 pages)
(30 pages)
(58 pages)
(52 pages)
(24 pages)
(34 pages)
(5 pages)
(14 pages)
(18 pages)
(36 pages)
(77 pages)
(30 pages)
(58 pages)
(52 pages)
(24 pages)
(34 pages)
(5 pages)
(14 pages)
(18 pages)
(36 pages)
© 2020, manymanuals.fr. Tous droits réservés | 0.793 s |
 Manymanuals.com
 Manymanuals.de
 Manymanuals.fr
 Manymanuals.it
 Manymanuals.pl
 Manymanuals.cz
 Manymanuals.es
 Manymanuals-pt.com
Commentaires sur ces manuels